

 GitHub
Get Hedhog updates in your inbox
New releases, fresh recipes, and breaking changes — no spam.
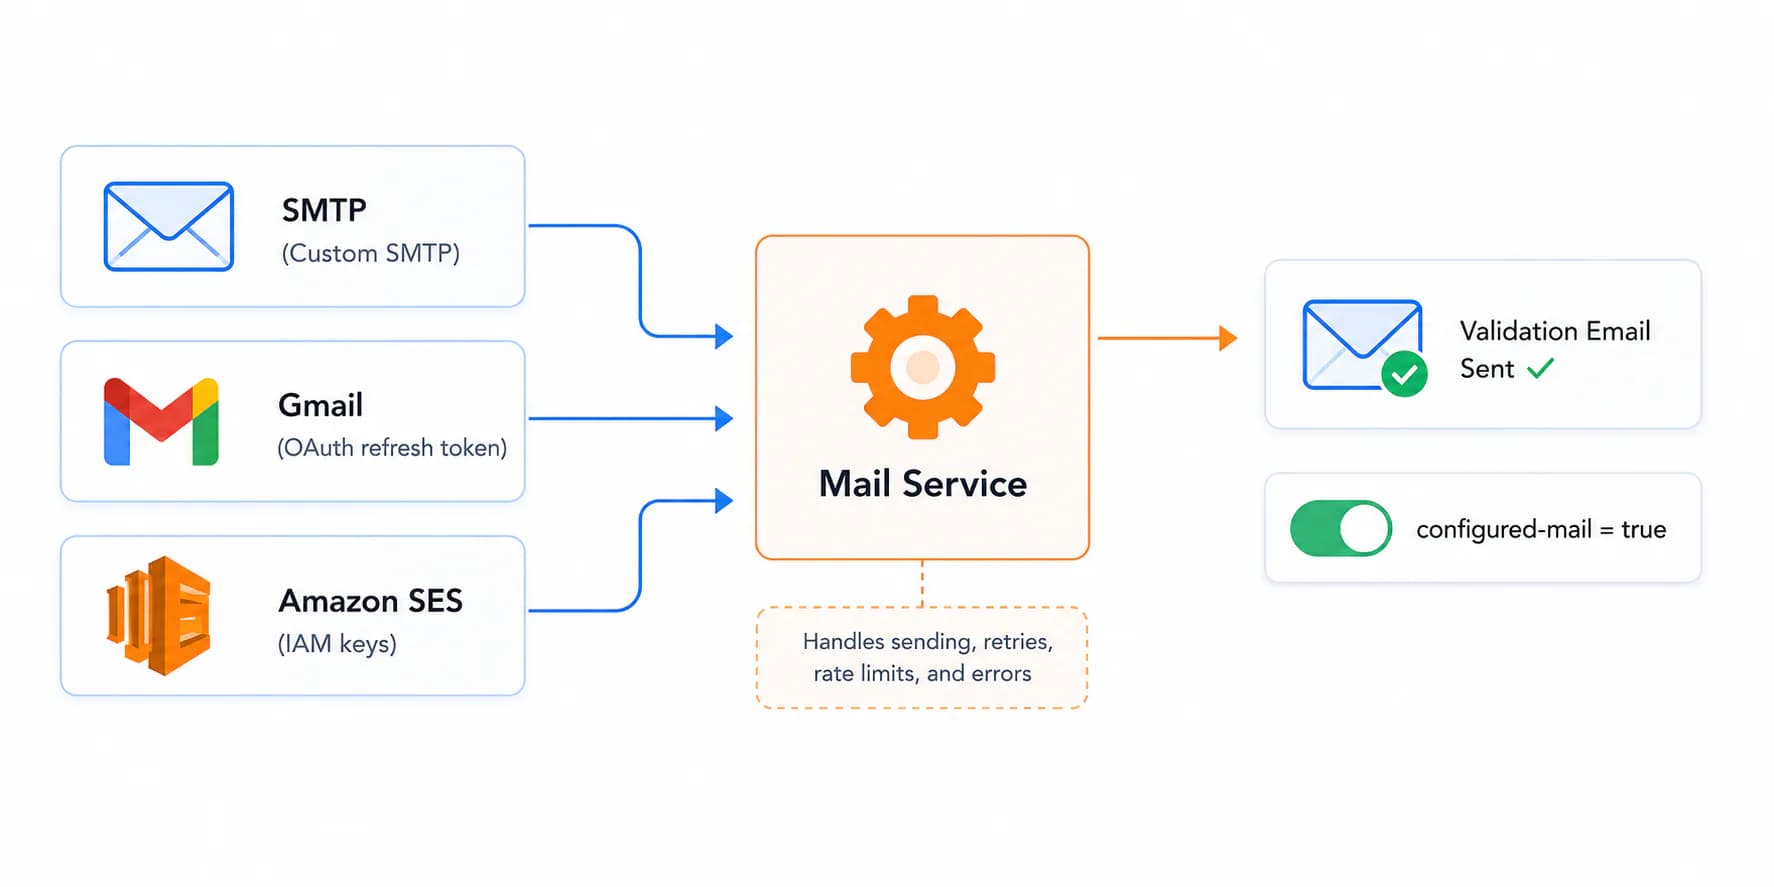
Hedhog sends transactional email through @hed-hog/core's MailService. Pick a provider once, and all system emails — password resets, invitations, OAuth sign-up confirmations, 2FA codes — use it automatically.
Status: ✅ Fully implemented — SMTP, Gmail, and Amazon SES all work, with an automatic self-test on save.
Quick Setup
- Create an Integration Profile (type Email, pick SMTP/Gmail/SES) at Settings → Integration Profiles
- Fill in the provider's config fields (tables below)
- Go to Settings → Configurations → General → Mail Configuration and set Mail Profile to it
- Check that Email Configured (
configured-mail) flips totrue— Hedhog emails itself automatically to confirm
How It Works
Like OAuth and storage, email credentials live in a generic Integration Profile (type email, provider smtp, gmail, or ses), not in flat settings. A single setting, mail-integration-profile-id, points at the active profile.
- Go to Settings → Integration Profiles → New → Type Email, pick a provider, and fill in its config fields (table below)
- Go to Settings → Configurations → General, find the Mail Configuration section, and set Mail Profile to that profile
- The moment you save, Hedhog automatically sends a validation email to the configured "from" address and flips an internal
configured-mailflag totrue— if delivery fails, the flag staysfalseand the error is logged, so you'll know immediately if credentials are wrong - From then on, every call to
MailService.sendTemplatedMail()across the app uses this provider
Switching providers later is just selecting a different profile — no code or redeploy needed, and Hedhog re-sends the validation email automatically.
Common Config Fields (all providers)
These three fields exist in the config JSON of every email profile, regardless of provider, and control the From/Reply-To headers:
| Config field | Description |
|---|---|
from_email | Sender address — also the address that receives the automatic validation email |
from_name | Optional display name shown before the address ("Name" <[email protected]>) |
reply_to_email / reply_to_name | Optional — set only if replies should go to a different address than from_email |
SMTP
Works with any SMTP server: Postfix, Mailgun, SendGrid, Mailchimp Transactional, Brevo, etc.
| Config field | Description |
|---|---|
host | SMTP server hostname (e.g. smtp.mailgun.org) |
port | Port — typically 587 (STARTTLS) or 465 (SSL) |
secure | true for port 465, false for 587 |
username | SMTP login username |
password | SMTP login password |
Gmail
Uses OAuth 2.0 with a refresh token — not a Gmail App Password. This requires creating a Google Cloud OAuth client and going through a one-time consent flow to obtain a refresh token, which is more setup than SMTP but doesn't depend on 2-Step Verification or app passwords being enabled on the account.
- In console.cloud.google.com, create an OAuth 2.0 Client ID of type Web application (or Desktop, if you'll generate the token with a local script) and enable the Gmail API
- Request the
https://mail.google.com/scope and complete the consent flow once (e.g. via Google's OAuth Playground, using your own client ID/secret under its settings gear icon) to obtain a refresh token — this is the part teams most often get stuck on, since it's a manual one-time step outside the Hedhog admin - Enter the values below in the Integration Profile
| Config field | Description |
|---|---|
client_id | OAuth client ID from Google Cloud Console |
client_secret | OAuth client secret |
refresh_token | Long-lived refresh token obtained via the consent flow above |
from_email | The Gmail address the refresh token was issued for |
The refresh token does not expire from inactivity the way access tokens do, but it can be revoked if the Google account's security settings change (password reset, app removed from account access, etc.) — if mail suddenly stops sending, regenerating the refresh token is the first thing to check.
Amazon SES
Suitable for high-volume production email. Requires an AWS account with SES access — note this uses the SES API directly (access_key_id/secret_access_key), not SES's SMTP interface, so the credentials are IAM keys, not SMTP credentials.
- Verify your domain (or sender address) in SES → Verified identities
- Create an IAM user (or role) with the
ses:SendEmailandses:SendRawEmailpermissions, and generate an access key pair for it - Note your SES region (e.g.
us-east-1) — it must match the region where the identity was verified
| Config field | Description |
|---|---|
region | AWS region where the identity is verified (e.g. us-east-1) |
access_key_id | IAM access key ID |
secret_access_key | IAM secret access key |
from_email | Must be a verified identity in that SES region |
Sandbox mode: new SES accounts can only send to addresses/domains that are also verified. Request production access in the SES console before going live, or every test send to a real user's inbox will fail silently from their perspective (bounced or rejected).
Verify It Worked
- After saving the profile, confirm Email Configured (
configured-mail) istruein Settings → Configurations → General - Trigger a real flow that sends mail — a password reset is the easiest — and confirm the message actually arrives, not just the automatic validation email Hedhog already sent itself
Troubleshooting
| Symptom | Likely cause |
|---|---|
configured-mail setting stays false after saving the profile | Credentials are wrong, or the SES/Gmail account isn't verified — check the API logs for the validation email's error |
No mail profile configured errors | mail-integration-profile-id isn't set, or points at a deleted profile |
Integration profile X is not an email profile | The selected profile's type isn't email (picked the wrong entity in the picker) |
| Gmail sends stop working out of nowhere | Refresh token was revoked — regenerate it through the consent flow |
| SES test emails never arrive | Account is still in sandbox mode and the recipient isn't a verified identity |